the exact step-by-step i used to make my own animated pixel character. you can do this too — in three simple steps.
made by @kaylanrupa
PinterestGeminiCapCut
Step 1 · The Setup
Turn yourself into a pixel character
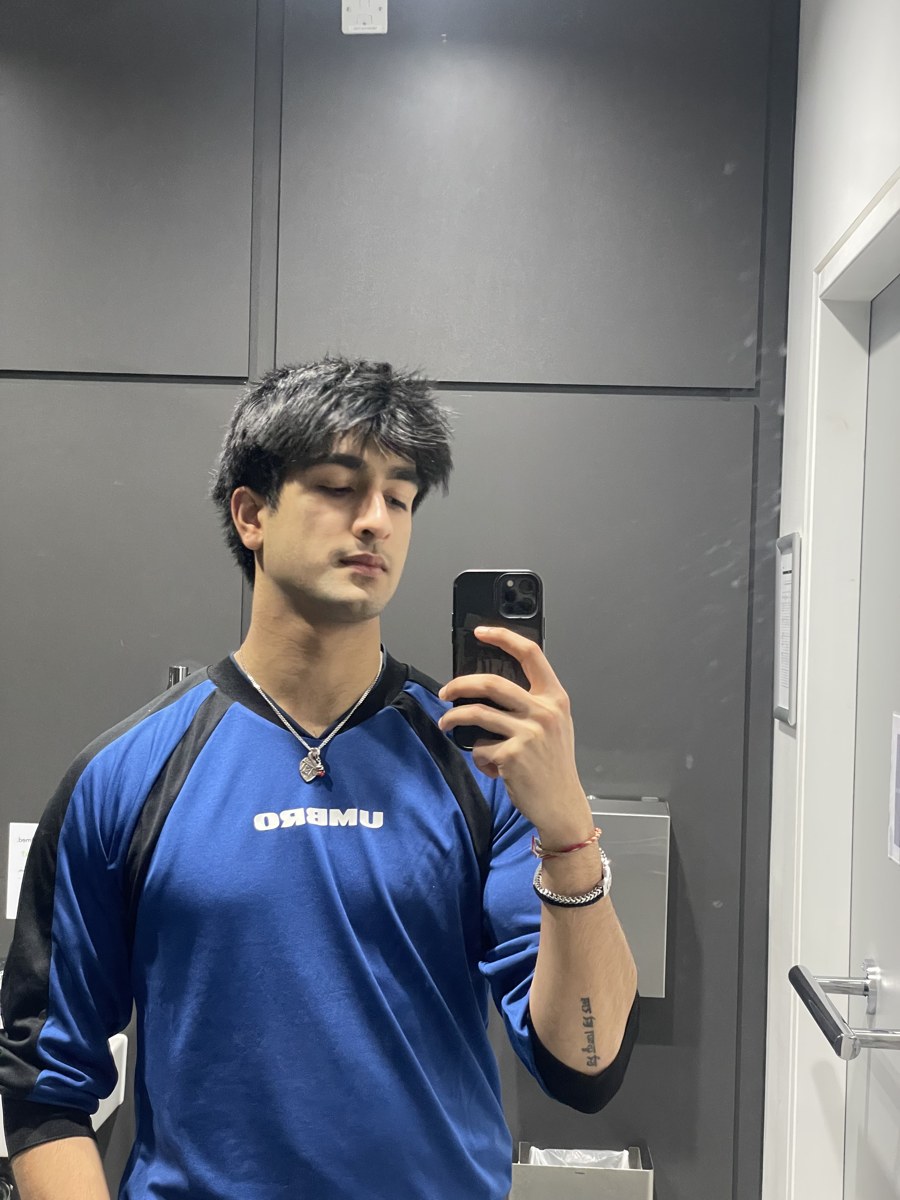
You feed the AI two things: a clear photo of you, and a pixel-art style you want to copy. It blends your face and outfit into that exact art style.
1 · Your photo
+
2 · Style reference
Open Gemini, start a new chat, and upload a clear, well-lit photo of yourself — full-body or upper-body, facing the camera.
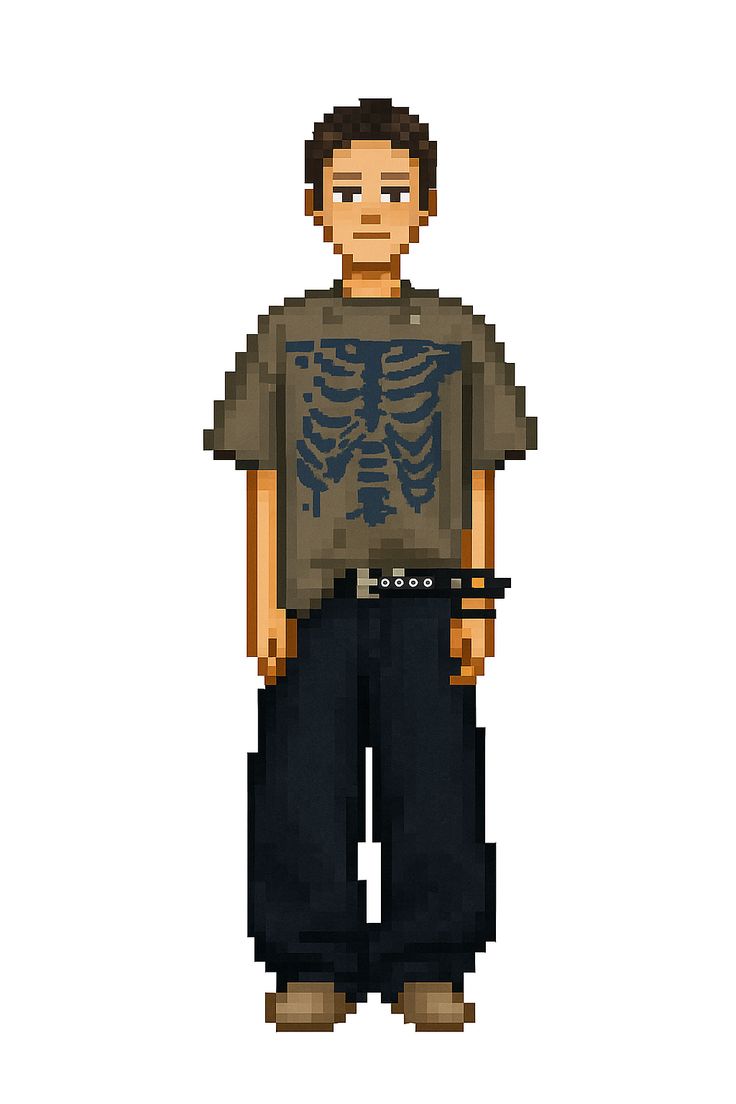
On Pinterest, search "pixel art character full body", save one whose style you love, and upload that too so the AI knows the vibe.
Paste the prompt below — it turns you into a pixel character in that style.
Step 1 promptCreate a flat 2D pixel art character based on the first photo of me, using the exact art style of the second reference image. Full body, standing straight, facing forward. Keep my clothing solid and simple. Plain white background.
Tip: If it doesn't look like you, just tell it what to fix in plain English — "messier hair", "blue t-shirt not grey", "baggier trousers". Keep nudging until it's right.
Step 2 · The Cheat Code
Get the AI to describe your character
This is where the magic happens. Before you animate, you need a perfect written description so the animation stays consistent and doesn't morph. The trick: don't write it — make the AI write it for you.
Your pixel character
Reply in the same Gemini chat with the prompt below. It spits out one clean paragraph — hair, top, trousers, belt, colours. Copy that paragraph; you'll paste it into Step 3.
Step 2 promptDescribe this pixel character in exact detail as one single paragraph — hair, face, top, trousers, shoes, accessories and all the colours — so it can be recreated identically. Write it as a prompt I can reuse.
Example of what it gives back
"A young man with messy black hair, a blue crew-neck t-shirt, baggy black trousers, a studded black belt, and a silver chain, drawn in flat 2D pixel art."
Why this matters: AI tools morph and glitch when they're guessing. An exact description locks your character in so every frame is the same person.
Step 3 · The Animation
Animate it on a green background
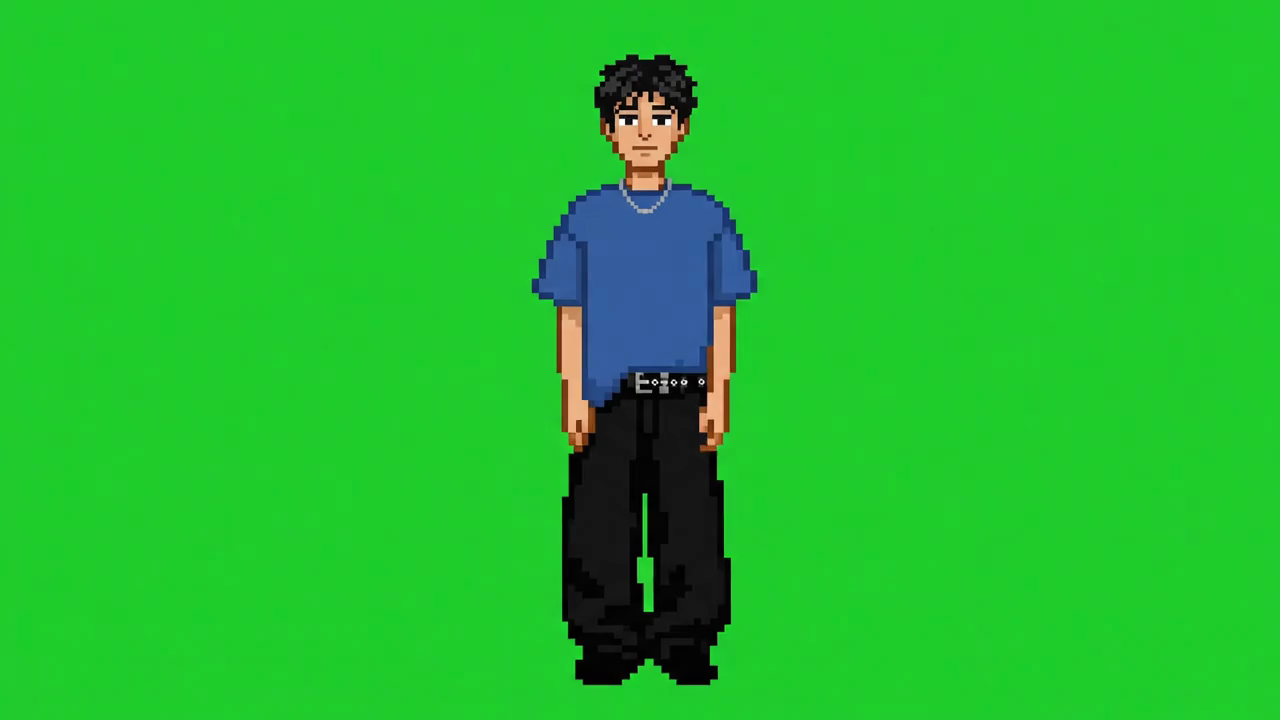
Attach your pixel character from Step 2, then have the AI animate it. Three secrets to a clean loop: a green background (to cut out later), the same start & end frame (so it loops with no jump), and a locked, stationary camera — the camera never moves, only your character does.
Attach: your pixel character
→
What you're aiming for
Step 3 promptA flat 2D pixel art, perfectly looping 9:16 vertical animation of [PASTE YOUR STEP 2 DESCRIPTION HERE]. He starts standing still, then reaches into his pocket and pulls out a magnifying glass, raises it up to his eye for a beat, then lowers it and slips it back into his pocket, returning to the exact same starting frame so it loops seamlessly. Zoomed-out, completely static, locked-off camera that never moves — the camera and framing stay fixed, only the character animates. Solid green background. No morphing, no warping.
The 4 things that stop it failing: (1) attach your Step 2 character image so it animates the right person. (2) "9:16 vertical" keeps it phone-shaped. (3) "zoomed out" stops the head getting cut off. (4) "static / locked-off camera" + "same start and end frame" + "no morphing" gives a clean, no-jump loop with zero camera drift. Leave any out and it usually breaks.
Then: download the green-screen video. That's everything you need for the last step.
Step 4 · CapCut
Remove the green in CapCut
Last step — cut out the green so you're left with just your character on a transparent background, ready to drop onto anything.
Before — green
→
After — removed
Open CapCut and import your green-screen video onto the timeline.
Tap the clip, open the Video tab, go to Remove BG.
Turn on Chroma key, grab the colour picker, tap the green in the preview.
Drag Intensity up until the green's gone, then nudge Shadow & Feather edge to clean the outline.
Export — set the format to Apple ProRes 4444. ProRes 4444 is the one that keeps the alpha (transparency) channel, so your removed background actually stays transparent. (A normal MP4 / H.264 export has no transparency — it fills the background back in, usually with black.) Save it as a .mov.
Why ProRes 4444: the “4444” includes the alpha channel that carries transparency. Export as a plain MP4 and the see-through background is gone for good — so keep it as ProRes 4444 .mov whenever you want it to stay transparent.
Pro tip: Layer your exported character over anything — a talking-head clip, your website, a reel intro. That's the whole trick.
and that's your own pixel you.
that's the entire process, start to finish. now go make one — tag me when you do, i'd love to see it.
Quick recap:
1 — Photo of you + a Pinterest style → pixel character
2 — Let the AI write the exact description for you
3 — Animate it, green background, same start & end frame
4 — CapCut chroma key → cut the green → done
One last thing — sometimes it takes a few attempts to get a clean result (a frame morphs, a loop jumps, the green won't key perfectly). That's just the nature of it. Don't stress — keep nudging it, and you learn a little more every single time you do.
@kaylanrupa
Tip: the animation at the top loops automatically. Share this file and it plays anywhere.